Saturday, October 28, 2006

A Maven2 multi-environment filter setup

Having been a happy user of Maven2 on my personal projects for a few months now, I finally tried to start using it at work. As I expected, development is quicker and more enjoyable as I didn't have to build the project manually, then copy and tailor an existing Ant build.xml to the new project. Creating the POM file is usually the most painful part of creating a new Maven2 project, but I have kind of a personal super-POM template which contains all the library dependencies and plugins I am likely to use. Examples of libraries are all the Apache Commons JARs, and examples of plugins are the Java 1.5 and the Jetty6 plugins, to name a few.

However, because my use of Maven2 was restricted to personal/toy projects, I had never had to worry about having to deploy the code to multiple environments. However, being able to deploy to multiple environments is a standard requirement for business applications, so this was obviously something I needed to address.

I vaguely remembered having read something about filtering support in Maven2, but I did not remember the details because I never had to use it. After about a day of reading up on Maven2's filter and profile support and tinkering with the pom.xml file, I had a Maven2 based setup which looked a lot like an Ant-based setup at a previous job, and which I knew from experience was easy to use and understand. This article describes this setup and provides cookbook style instructions on how to replicate it.

The basic idea of filtering is that you set up a named properties file and specify one or more filesets to apply the substitutions in the properties file. For example:

1
2
3
4
5
6
7
8
9
<filters>
  <filter>src/main/filters/filter-${env}.properties</filter>
</filters>
<resources>
  <resource>
    <directory>src/main/resources</directory>
    <filtering>true</filtering>
  </resource>
</resources>

The only difference from the snippet above and that provided in most Maven2 documentation is that the filter.properties file has a variable portion ${env}, which in our case will come from the selected profile. So assuming we want the database URL to be our replaceable parameter in each case (obviously there will be many more replaceable parameters per environment, but this is only an example), we set up our src/main/resources/applicationContext.properties (Spring configuration file) to contain the placeholder for the URL, something like this:

1
2
3
4
5
<bean id="dataSource" class="org.springframework.jdbc.datasource.DriverManagerDataSource">
  ...
  <property name="url" value="${jdbc.url}" />
  ...
</bean>

Assuming now that we want to filter for three different environments, dev, test and live, we will create three filter-${env}.properties files in src/main/filters directory. The urls are incorrect and are only for illustration, replace with valid values that make sense for your application.

 1
 2
 3
 4
 5
 6
 7
 8
 9
10
11
# filter-dev.properties
jdbc.url=jdbc:path:to:dev/database
...

# filter-test.properties
jdbc.url=jdbc:path:to:test/database
...

# filter-live.properties
jdbc.url=jdbc:path:to:live/database
...

Finally, we need a way to specify to Maven2 that we want to build an artifact for one the specified environments. We use profiles for this. The following profiles need to be declared in the POM.

 1
 2
 3
 4
 5
 6
 7
 8
 9
10
11
12
13
14
15
16
17
18
19
20
21
22
23
24
25
<!-- default environment -->
<properties>
  <env>dev</env>
</properties>
<!-- profiles -->
<profiles>
  <profile>
    <id>dev</id>
    <properties>
      <env>dev</env>
    </properties>
  </profile>
  <profile>
    <id>test</id>
    <properties>
      <env>test</env>
    </properties>
  </profile>
  <profile>
    <id>live</id>
    <properties>
      <env>live</env>
    </properties>
  </profile>
</profiles>

Notice that the profile definition is really slim, all it contains is the setting for the ${env} variable. I guess this is a personal preference, but I like all my environment specific information in one place, makes life easier when trying to figure out cross-environment configuration issues. Notice also the default setting for ${env}, this is used in case a profile is not specified.

Now we have all our pieces in place, running targets for different environments is simply a matter of specifying the profile in the mvn command. So:

1
2
3
$ mvn war:war -P dev    # builds a war file with filter-dev.properties values
$ mvn war:war           # same as above, uses default ${env} setting
$ mvn war:war -P live   # builds a war file with filter-live.properties values

I hope this article was informative. There does not seem to be too much information on how to do this sort of thing with Maven2, perhaps because this process is not standard and teams and organizations have evolved different strategies to deal with this problem. For a while I thought that there was no way to do this natively with Maven2, and I started playing with the maven-antrun-plugin to delegate this work to an Ant build.xml file, but I was not able to pass the environment (passed into Maven2 with -Denv=dev) from Maven to Ant, so I gave up. I am glad I did, and many thanks to Eric Redmond for his article, because otherwise I would not have come up with this.

Resources

Saturday, October 21, 2006

Using Jython to call Java

I have been writing standalone Java applications lately, which are run from within a shell script, something like the snippet below. Calling Java standalones in this way is a fairly standard approach. However, being a Python fan(atic?), I would like to write these shell scripts using Python. This article describes how to call Java programs using Jython, which is a Java port of the Python programming language.

1
2
3
#!/bin/bash
LIBDIR=/path/to/my/jar/repository
java -classpath $LIBDIR/commons-lang-2.1.jar:  $LIBDIR/com-mycompany-4.9.jar com.mycompany.mypackage.MyClass $*

In MyClass.java, I have a static main(String[] argv) method which gets invoked as a result of the call above. All it does is instantiate an instance of MyClass and pass some parameters to it, and then call a method on it that does the work. Here is an example, basically yet another implementation of HelloWorld.java, but it will do for illustrating the pattern.

 1
 2
 3
 4
 5
 6
 7
 8
 9
10
11
12
13
14
15
16
17
18
19
20
21
22
23
24
25
26
27
28
29
30
package com.mycompany.mypackage;

import org.apache.commons.lang.StringUtils;

public class MyClass {

  private String name;

  public MyClass() {
    super();
  }

  public void setName(String name) {
    this.name = name;
  }

  public String greet() {
    if (StringUtils.isEmpty(name)) {
      return "Hi there";
    } else {
      return "Hi " + name;
    }
  }

  public static void main(String[] argv) {
    MyClass myclass = new MyClass();
    myclass.setName(argv[0]);
    System.out.println(myclass.greet());
  }
}

Arguably, classes in the real world have more code in their main() methods, but the approach I take when I see that I have more than one object being invoked in my main method, is to factor out the logic into private methods of that class, or into a Main.java class in that package if multiple classes are involved.

Anyway, the Jython script to call the main method of MyClass with a single string parameter that is passed in from the command line is shown below. Notice how the Jython script instantiates the MyClass object. The classpath is passed in to Jython using sys.path.append() calls. Resource files, such as .properties files or other XML configuration files need to be baked into the JAR file and should be accessible from within the Java code using getResourceAsStream().

 1
 2
 3
 4
 5
 6
 7
 8
 9
10
11
12
13
14
15
16
17
18
19
20
21
22
23
24
25
26
27
28
29
#!/usr/bin/env jython
import sys

def setClassPath():
  libDir = "/path/to/my/jar/files/"
  classPaths = [
    "commons-lang-2.1.jar",
    "com-mycompany-4.9.jar"
  ]
  for classPath in classPaths:
    sys.path.append(libDir + classPath)

def runJavaClass(name):
  from com.mycompany.mypackage import MyClass
  mc = MyClass()
  if (name != None):
    mc.setName(name)
  print mc.greet()

def main():
  if (len(sys.argv) < 2):
    name = None
  else:
    name = sys.argv[1]
  setClassPath()
  runJavaClass(name)

if __name__ == "__main__":
  main()

As you can see, invoking Java programs from Jython leads to cleaner but more verbose scripts, but does seem to be overkill in our case. However, this approach can really help when you have to design more complicated scripts that deal with a large number of classes. One approach, and my preferred one, is to put this logic in Java in another abstraction layer. However, sometimes, this is not the most practical approach, perhaps because the rules are rather fluid, and you would like to be able to change the rules without having to go through a big release cycle. In such cases, and depending on the complexity of the rules, I think I would be more productive using Python than Shell Scripts. Even if the rules were simple enough to be encoded within a Shell Script to start out with, it may still be more practical to use Jython, since the rules can get more complicated, and you may be faced with having to rewrite the script.

I don't think it is possible to set JVM parameters (such as minimum and maximum JVM sizes) to Jython from within the Jython script, something that is possible using a Shell Script. Jython itself is a shell script and calls the org.python.util.jython class, so these parameters can be passed into the Java invocation in the jython shell script, although this does not seem to be very clean. Running the class through Jython also seems a little slower than running it through a Shell Script, but I haven't done any benchmarks to say this conclusively.

Saturday, October 14, 2006

A Custom Digester rule

I recently took another look at Apache Commons Digester, a popular toolkit for parsing XML files into JavaBeans. The last time I used it, it was to parse an XML configuration file for an application I was building. Nowadays I would use Spring, but that was a long time ago.

The Digester is built on top of a standard SAX parser. A SAX parser reacts to events fired when the various opening and closing tags are encountered. Since there is a single event handler per parser, the code to handle various types of elements for a single event can get pretty messy. Unlike the standard SAX parser, the Digester matches Rules to element patterns. The element patterns look like XPath expressions, and the Rules are objects which operate on a Stack maintained by the Digester.

Because the code for handling various tags (as indicated by the XPath like expressions) are all encapsulated in the Rules, and because the Digester package comes with a small but very comprehensive set of generic Rules, parser code written using the Digester is very readable and easy to maintain.

The last time I used Digester, I had pretty much copied and pasted code that I found somewhere, and magically it all worked, so I did not really bother to understand how it actually worked. This time around, my requirements went beyond what was addressed by the basic examples, so I was forced to read up a bit on it. These web pages served as excellent introductions:

In addition, there is also the Reference Manual buried in the API Javadocs. It is also always a good idea to download the source distribution and look at the examples. Finally, the The Jakarta Commons Cookbook has some very interesting recipes on Digester use as well.

My first take was that you could use Digester only if you built your JavaBean to conform really closely to the XML input file. It was not clear to me was how to map an attribute or element named "foo" to a JavaBean property named "bar". It is actually fairly easy with the CallMethodRule. The basic pattern of parsing an XML file with a Digester is as follows:

1
2
3
4
5
6
Digester digester = new Digester();
digester.addRule("/person", new ObjectCreateRule(Person.class));
digester.addRule("/person/name", new CallMethodRule("setNomDePlume", 1));
digester.addRule("/person/name", new CallParamRule(0));
...
Person person = digester.parse(xmlFileName);

While the above pattern sufficed for most of my requirements, the one thing I could not get from the built in Rules was to set the contents of a Node to a String bean property. Digester offers the NodeCreateRule which can read a Node object specified by a pattern and set a Node member variable, but since I wanted to set the variable directly, I created a very simple custom rule which I called the SetSerializedNodeRule, and which is shown below.

 1
 2
 3
 4
 5
 6
 7
 8
 9
10
11
12
13
14
15
16
17
18
19
20
21
22
23
24
25
26
27
28
29
30
31
32
33
34
35
36
public class SetSerializedNodeRule extends NodeCreateRule {

  private String method;

  public SetSerializedNodeRule() throws ParserConfigurationException {
    super(Node.ELEMENT_NODE);
  }

  public SetSerializedNodeRule(String method) throws ParserConfigurationException {
    this();
    this.method = method;
  }

  public void end() throws Exception {
    Element nodeToSerialize = (Element) super.digester.pop();
    String serializedNode = serializeNode(nodeToSerialize);
    invokeMethodOnTopOfStack(method, serializedNode);
  }

  protected String serializeNode(Element nodeToSerialize) throws Exception {
    StringWriter writer = new StringWriter();
    DocumentBuilderFactory factory = DocumentBuilderFactory.newInstance();
    DocumentBuilder builder = factory.newDocumentBuilder();
    Document doc = builder.newDocument();
    OutputFormat format = new OutputFormat(doc);
    XMLSerializer serializer = new XMLSerializer(writer, format);
    serializer.serialize(nodeToSerialize);
    String serialized = writer.getBuffer().toString();
    return serialized;
  }

  protected void invokeMethodOnTopOfStack(String methodName, String param) throws Exception {
    Object objOnTopOfStack = digester.peek();
    MethodUtils.invokeExactMethod(objOnTopOfStack, methodName, param);
  }
}

To help write this Rule, I looked at the source for NodeCreateRule and some of the other Rule objects in the Apache Commons Digester source distribution. The XML serialization uses the org.apache.xml XMLSerializer to convert the Node object to a String, then calls the specified method on the top level object at the top of the Stack. Calling this rule is similar to calling the CallMethodRule, passing in the method name that should be invoked with the serialized contents of the Node object we are pointing to. Here is an example:

1
digester.addRule("foo/bar", new SerializeNodeRule("setBody"));

I found Digester to be quite simple to use, thanks to its clean design and the Rules that come bundled with the distribution. The readability and maintainability of the code also goes up enormously when switching from SAX or DOM parser implementations. I haven't really run any performance numbers, but I am guessing that the performance would be slower than an equivalent SAX parser but much faster than a DOM parser, and the memory footprint would be comparable to a SAX parser.

Saturday, October 07, 2006

Python scripting with Oracle

I had not used Oracle in a while, and when I last used it, I didn't know about Python. Python has become my scripting language of choice for about a year now. My current database at work is Oracle, so it was natural for me to investigate if I could use Python to communicate with the remote Oracle database. This post describes in a step-by-step manner what I needed to get Python to work with the Oracle database.

I run Python 2.4.1 on Fedora Core 4 Linux. The Oracle version is Oracle 10g. The Oracle database runs on a central machine, and I did not have any Oracle software installed on my development machine, and nor did I want to download and run a lightweight version of Oracle, such as Oracle 10g Express Edition to get at the software. Not that I am short of disk or resources on my local box, it just seemed kind of wasteful, and I did not want to have to learn how to administer an Oracle database before I could get Oracle access on my machine.

However, Python libraries for various databases generally follow the same strategy to connect to the database as a person would if using the default command line client. Unlike JDBC on Java, for instance, which provide an uniform interface regardless of whether you connect to MySQL or Oracle or PostgreSQL or Sybase. In this case too, unless you are set up to connect using SQL*Plus (the default client), you are pretty much out of luck connecting with any of the Python libraries for Oracle connectivity. I guess this makes sense - unless you were comfortable working with the database interactively, why would you bother to learn how to start scripting it?

Someone at work pointed me to the Oracle Instant Client. This is a small client that allows you to access a remote Oracle database through a set of shared libraries. The one major application that comes with it is SQL*Plus. I downloaded the 10.1 version, which was the latest at the time. It is packaged as a zip file which you need to unzip into a location of your choice. In order to get SQL*Plus to work, you need to set up your LD_LIBRARY_PATH to point to your Instant Client Installation directory, and your PATH to point to SQL*Plus. You can do this in your .bash_profile, like so:

1
2
3
IC_INSTALL_DIR=/opt/oracle/instantclient10_1
export PATH=$IC_INSTALL_DIR:$PATH
export LD_LIBRARY_PATH=$IC_INSTALL_DIR:$LD_LIBRARY_PATH

This will allow your SQL*Plus prompt to come up, but you will not be able to login to the database. To login to the database, you need to configure the Instant Client libraries with a file called tnsnames.ora. You can configure the Instant Client libraries to look for it in a directory of your choice by also setting the TNS_ADMIN environment variable in your .bash_profile, like so:

1
TNS_ADMIN=/etc

And my /etc/tnsnames.ora looks like this (all names changed to protect the guilty):

1
2
3
4
5
6
7
8
9
remotedb =
  (DESCRIPTION =
    (ADDRESS_LIST =
      (ADDRESS = (PROTOCOL = TCP)(HOST = remotehost.mycompany.com)(PORT = 1234))
    )
    (CONNECT_DATA =
      (SERVICE_NAME = remotedb)
    )
  )

So now I can connect to my remote database server remotehost.mycompany.com:1234/remotedb as scott/tiger (not my real user/password, by the way) using SQL*Plus like so:

 1
 2
 3
 4
 5
 6
 7
 8
 9
10
11
$ sqlplus scott/tiger@remotedb

SQL*Plus: Release 10.1.0.5.0 - Production on Sat Oct 7 11:34:04 2006

Copyright (c) 1982, 2005, Oracle.  All rights reserved.

Connected to:
Oracle Database 10g Enterprise Edition Release 10.1.0.3.0 - Production
With the Partitioning, OLAP and Data Mining options

SQL>

Now that I could connect to the remote database from the command line, it was time to install the Oracle library for Python. There are least two Oracle libraries for Python, DCOracle from Zope Corporation, and cx_Oracle from CXTools. I tried cx_Oracle, and it works great. It is packaged as an RPM, but unfortunately there are no RPMs for my operating system Fedora Core 4. I tried the Fedora Core 5 RPMs, but that has a dependency on glibc 2.4 which I did not have, so I tried the RPM for Fedora Core 3 (cx_Oracle-4.1.2-1), which installed fine.

The only catch was that the cx_Oracle RPM wrote its shared object file to /usr/local/lib/python2.4/site-packages, which seems to be correct behavior, but I could not find it in the list of directories Python looks at for shared objects.

1
2
3
4
5
6
7
8
9
Python 2.4.1 (#1, May 16 2005, 15:19:29)
[GCC 4.0.0 20050512 (Red Hat 4.0.0-5)] on linux2
Type "help", "copyright", "credits" or "license" for more information.
>>> import sys
>>> print sys.path
['', '/usr/lib/python24.zip', '/usr/lib/python2.4', '/usr/lib/python2.4/plat-linux2', 
'/usr/lib/python2.4/lib-tk', '/usr/lib/python2.4/lib-dynload', 
'/usr/lib/python2.4/site-packages', '/usr/lib/python2.4/site-packages/Numeric', 
'/usr/lib/python2.4/site-packages/gtk-2.0']

Since /usr/lib/python2.4/site-packages was in the sys.path, I just created a symbolic link for the cx_Oracle.so file so it would be visible there:

1
2
cd /usr/lib/python2.4/site-packages
ln -s /usr/local/lib/python2.4/site-packages/cx_Oracle.so cx_Oracle.so

Finally, I wrote a little Python test script to check that I will be able to access the database through Python.

 1
 2
 3
 4
 5
 6
 7
 8
 9
10
11
12
13
14
15
#!/usr/bin/python
# Test script to test connectivity.
import cx_Oracle

uid="scott"
pwd="tiger"
service="remotedb"
db = cx_Oracle.connect(uid + "/" + pwd + "@" + service)
cursor = db.cursor()
cursor.execute("select * from my_test_table")
rows = cursor.fetchall()
print "#-records:", cursor.rowcount
for i in range(0, cursor.rowcount):
  print rows[i][0], rows[i][1]
cursor.close()

I was able to get the number of records, and the first and second columns of each row in my_test_table.

This is basically all that I did to be able to access the remote Oracle database from a Python script. Prior to this, people (at my company) had been wrapping SQL*Plus calls in Shell scripts or dropping down to PL/SQL to write stored procedures. Both these approaches are valid in the sense that they both get the work done. However, this approach requires us to make a concious decision to select the right tool for the problem at hand, and possibly have to rewrite our solution when the level of complexity crosses a certain threshhold. The neat thing about using a (Python) script is that we can use the same tool regardless of the complexity. Having worked with both shell scripts and PL/SQL in the past, I can confidently say that Python is easier to work with and more feature rich than either of these languages.

Sunday, October 01, 2006

GWT: AJAX framework for the Javascript averse

I have been meaning to check out GWT (Google Web Toolkit) since JavaOne this year, when I overheard someone tell someone else how "absolutely freakin' wonderful" it was. But since most of the AJAX related work I did was concerned with returning data from the server for AJAX-ified front end components, the opportunity did not come up. Recently though, based on something I had to do at work, I decided to use GWT to try and build a test component with two dropdown lists for my personal book reviews application. The objective was to check out how easy/hard it would be to do, and to create a template for the stuff I had to do at work. This article describes the code for this widget and the things I had to do to get it working.

Very briefly, GWT allows you to build your Javascript widgets using Java and the GWT widget class library. It allows you to generate Javascript code from the Java code you write. Only the Javascript code will be shipped to your production server.

Problem definition

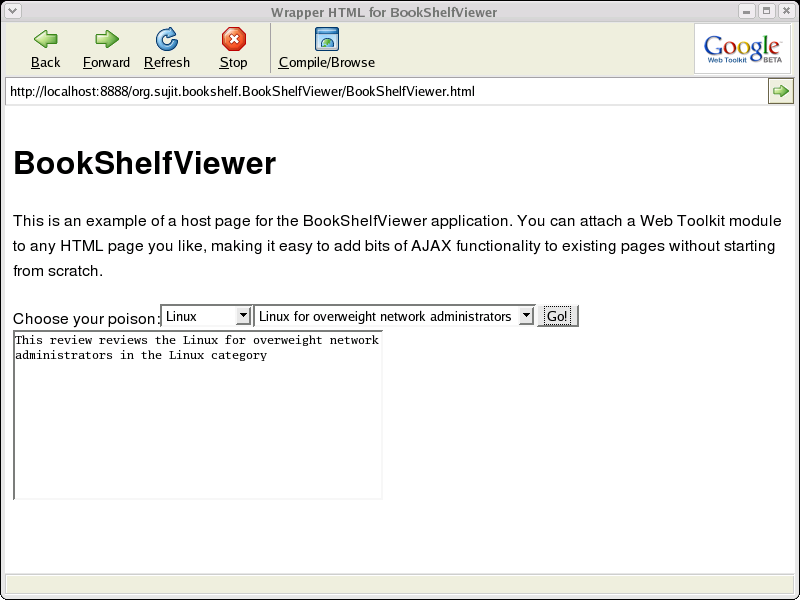
So here's the problem. I have a bunch of reviews on books on various subjects, so I would like to be able to categorize the books by type, then by title. There are 2 dropdowns. The first dropdown lists the various categories of books I have reviewed, such as "Linux", "Java", "Databases", etc. The second dropdown lists the book titles in the category selected in the first dropdown. Once I select a category from the first dropdown and a title from the second dropdown, and then hit the Go button, the review should show up in a TextArea below the dropdowns.

Download GWT

The first step was to download the GWT SDK from the GWT site. GWT class libraries (the widgets) are available under an Apache 2.0 license, but the toolkit itself is covered under a slightly different license. However, that should not bother most developers, since GWT is free for both commercial and non-commercial use, and Google's license does not assert any rights to the code you create with GWT, so its yours, free and clear. GWT is currently available for Windows and Linux. I downloaded the Linux version.

Create project

GWT comes with some scripts to build an Eclipse application. There is also scripts to build an Ant application, for those who do not use Eclipse, but I did not look at that. There are three scripts that need to be run, the first to create the Eclipse project, the second to create an empty GWT application skeleton, and the third to create a JUnit test case for the application.

 1
 2
 3
 4
 5
 6
 7
 8
 9
10
11
12
13
14
15
16
17
18
19
20
21
22
23
24
[sujit@cyclone gwt-linux-1.0.21]$ ./projectCreator -eclipse bookshelf -out /home/sujit/src/bookshelf
Created directory /home/sujit/src/bookshelf/src
Created file /home/sujit/src/bookshelf/.project
Created file /home/sujit/src/bookshelf/.classpath

[sujit@cyclone gwt-linux-1.0.21]$ ./applicationCreator -eclipse bookshelf -out /home/sujit/src/bookshelf org.sujit.bookshelf.client.BookShelfViewer
Created directory /home/sujit/src/bookshelf/src/org/sujit/bookshelf
Created directory /home/sujit/src/bookshelf/src/org/sujit/bookshelf/client
Created directory /home/sujit/src/bookshelf/src/org/sujit/bookshelf/public
Created file /home/sujit/src/bookshelf/src/org/sujit/bookshelf/BookShelfViewer.gwt.xml
Created file /home/sujit/src/bookshelf/src/org/sujit/bookshelf/public/BookShelfViewer.html
Created file /home/sujit/src/bookshelf/src/org/sujit/bookshelf/client/BookShelfViewer.java
Created file /home/sujit/src/bookshelf/BookShelfViewer.launch
Created file /home/sujit/src/bookshelf/BookShelfViewer-shell
Created file /home/sujit/src/bookshelf/BookShelfViewer-compile

[sujit@cyclone gwt-linux-1.0.21]$ ./junitCreator -junit /usr/java/eclipse/plugins/org.junit_3.8.1/junit.jar -eclipse BookShelfViewer -out /home/sujit/src/bookshelf org.sujit.bookshelf.test.BookShelfViewerTest
Created directory /home/sujit/src/bookshelf/src/org/sujit/bookshelf/test
Created file /home/sujit/src/bookshelf/src/org/sujit/bookshelf/BookShelfViewerTest.gwt.xml
Created file /home/sujit/src/bookshelf/src/org/sujit/bookshelf/test/BookShelfViewerTest.java
Created file /home/sujit/src/bookshelf/BookShelfViewerTest-hosted.launch
Created file /home/sujit/src/bookshelf/BookShelfViewerTest-web.launch
Created file /home/sujit/src/bookshelf/BookShelfViewerTest-hosted
Created file /home/sujit/src/bookshelf/BookShelfViewerTest-web

Notice that this means that you have a project for each GWT component that you decide to build. For those who prefer developing within a monolithic environment, where there is a single web project, and we just keep adding new functionality into it, this may not be the best thing, but having your web project built off a number of tiny projects does lead to more maintainability, and the ability to release code with the confidence that you haven't broken something somewhere else.

XML Configuration

Configuration is quite simple. There is a ${projectname}.gwt.xml that provides the information about the entry point to our GWT module. The entry-point element provides the class name for our main widget, and the servlet-path provides information about the backend service.

Note that the configuration is all for development. In production, you will simply ship the generated Javascript code on the front end, and the servlet on the backend.

1
2
3
4
5
6
7
<module>
  <!-- Inherit the core Web Toolkit stuff.                  -->
  <inherits name='com.google.gwt.user.User'/>
  <!-- Specify the app entry point class.                   -->
  <entry-point class='org.sujit.bookshelf.client.BookShelfViewer'/>
  <servlet path="/bookshelf-service" class="org.sujit.bookshelf.server.BookShelfServiceServlet" />
</module>

The Widget Code

The Widget Code is built off the components available in the GWT Widget class library. The style should be familiar to anyone who has written Java Swing code. The onModuleLoad() method is called when the module loads, and is the place where the widget is defined. The onChange() method is called whenever the selected item changes in either ListBox object, and the onClick() method is called when the Go button is clicked. The constructory specifies the location of the backend service. The getXXX() and setXXX() methods provide accessors and mutators for the internal variables which store the contents of the ListBox and the TextArea objects. The loadXXX() methods are responsible for pulling data off the backend component (more on that below), and the refreshXXX() methods are responsible for taking the backend data and populating the ListBox and TextArea widgets.

  1
  2
  3
  4
  5
  6
  7
  8
  9
 10
 11
 12
 13
 14
 15
 16
 17
 18
 19
 20
 21
 22
 23
 24
 25
 26
 27
 28
 29
 30
 31
 32
 33
 34
 35
 36
 37
 38
 39
 40
 41
 42
 43
 44
 45
 46
 47
 48
 49
 50
 51
 52
 53
 54
 55
 56
 57
 58
 59
 60
 61
 62
 63
 64
 65
 66
 67
 68
 69
 70
 71
 72
 73
 74
 75
 76
 77
 78
 79
 80
 81
 82
 83
 84
 85
 86
 87
 88
 89
 90
 91
 92
 93
 94
 95
 96
 97
 98
 99
100
101
102
103
104
105
106
107
108
109
110
111
112
113
114
115
116
117
118
119
120
121
122
123
124
125
126
127
128
129
130
131
132
133
134
135
136
137
138
139
140
141
142
143
144
145
146
147
148
149
150
151
152
153
154
155
156
157
158
159
160
161
162
163
164
165
166
167
168
169
170
171
172
173
174
175
176
177
178
179
180
181
182
183
184
185
186
187
188
189
190
191
192
193
194
195
196
197
198
199
200
201
202
203
204
205
206
207
208
209
210
211
212
213
214
215
216
217
218
219
220
221
222
223
224
225
226
227
228
229
230
231
232
233
234
235
236
237
238
package org.sujit.bookshelf.client;

import java.util.Iterator;
import java.util.List;

import com.google.gwt.core.client.EntryPoint;
import com.google.gwt.core.client.GWT;
import com.google.gwt.user.client.rpc.AsyncCallback;
import com.google.gwt.user.client.rpc.ServiceDefTarget;
import com.google.gwt.user.client.ui.Button;
import com.google.gwt.user.client.ui.ChangeListener;
import com.google.gwt.user.client.ui.ClickListener;
import com.google.gwt.user.client.ui.HorizontalPanel;
import com.google.gwt.user.client.ui.Label;
import com.google.gwt.user.client.ui.ListBox;
import com.google.gwt.user.client.ui.RootPanel;
import com.google.gwt.user.client.ui.TextArea;
import com.google.gwt.user.client.ui.VerticalPanel;
import com.google.gwt.user.client.ui.Widget;

public class BookShelfViewer implements EntryPoint, ChangeListener, ClickListener {

  private static final String WAIT_MESSAGE = "Retrieving, please wait...";

  // data to be shown in widget
  private List categories;
  private List titlesInCategory;
  private String review;

  // internal tracking indexes
  private int selectedCategoryIndex;
  private int selectedTitleIndex;

  // we are listening on events raised by these widgets.
  private ListBox categoryListBox;
  private ListBox titleListBox;
  private Button goButton;
  private TextArea reviewTextArea;

  // Async interface of a service
  private BookShelfServiceAsync bookShelfService;

  public BookShelfViewer() {
    super();
    bookShelfService = (BookShelfServiceAsync) GWT.create(BookShelfService.class);
    ServiceDefTarget serviceEndPoint = (ServiceDefTarget) bookShelfService;
    serviceEndPoint.setServiceEntryPoint("/bookshelf-service");
  }

  public List getCategories() {
    return this.categories;
  }

  public void setCategories(List categories) {
    this.categories = categories;
  }

  public String getReview() {
    return this.review;
  }

  public void setReview(String review) {
    this.review = review;
  }

  public int getSelectedCategoryIndex() {
    return this.selectedCategoryIndex;
  }

  public void setSelectedCategoryIndex(int selectedCategoryIndex) {
    this.selectedCategoryIndex = selectedCategoryIndex;
  }

  public int getSelectedTitleIndex() {
    return this.selectedTitleIndex;
  }

  public void setSelectedTitleIndex(int selectedTitleIndex) {
    this.selectedTitleIndex = selectedTitleIndex;
  }

  public List getTitlesInCategory() {
    return this.titlesInCategory;
  }

  public void setTitlesInCategory(List titlesInCategory) {
    this.titlesInCategory = titlesInCategory;
  }

  /**
   * This is the entry point method.
   */
   public void onModuleLoad() {

     loadCategories();
     loadTitlesInCategory("Databases");

     Label label = new Label("Choose your poison:");

     categoryListBox = new ListBox();
     categoryListBox.setVisibleItemCount(1);
     categoryListBox.setSelectedIndex(0);
     refreshCategoryListBox(categories);
     categoryListBox.addChangeListener(this);
     setSelectedCategoryIndex(0);

     titleListBox = new ListBox();
     titleListBox.setVisibleItemCount(1);
     titleListBox.setSelectedIndex(0);
     refreshTitleListBox(titlesInCategory);
     titleListBox.addChangeListener(this);
     setSelectedTitleIndex(0);

     goButton = new Button();
     goButton.setText("Go!");
     goButton.addClickListener(this);

     reviewTextArea = new TextArea();
     reviewTextArea.setCharacterWidth(50);
     reviewTextArea.setVisibleLines(10);
     loadReviews(getSelectedCategoryIndex(), getSelectedTitleIndex());
     refreshReviewTextArea(review);

     HorizontalPanel toolbarPanel = new HorizontalPanel();
     toolbarPanel.add(label);
     toolbarPanel.add(categoryListBox);
     toolbarPanel.add(titleListBox);
     toolbarPanel.add(goButton);

     VerticalPanel componentPanel = new VerticalPanel();
     componentPanel.add(toolbarPanel);
     componentPanel.add(reviewTextArea);

     RootPanel.get().add(componentPanel);
   }

   /**
    * Event raised by selections in the category list box and title list boxes
    * will trigger this method.
    * @see com.google.gwt.user.client.ui.ChangeListener#onChange(com.google.gwt.user.client.ui.Widget)
    * @param sender the widget that raised the event.
    */
   public void onChange(Widget sender) {
     if (sender == categoryListBox) {
       // update the title list box
       int selectedIndex = categoryListBox.getSelectedIndex();
       setSelectedCategoryIndex(selectedIndex);
       String categoryName = (String) categories.get(selectedIndex);
       loadTitlesInCategory(categoryName);
       refreshTitleListBox(titlesInCategory);
     } else if (sender == titleListBox) {
       int selectedIndex = titleListBox.getSelectedIndex();
       setSelectedTitleIndex(selectedIndex);
     }
   }

   /**
    * Events raised by clicking the "Go" button will trigger this method.
    * @see com.google.gwt.user.client.ui.ClickListener#onClick(com.google.gwt.user.client.ui.Widget)
    * @param sender the widget that raised this event.
    */
   public void onClick(Widget sender) {
     if (sender == goButton) {
       loadReviews(getSelectedCategoryIndex(), getSelectedTitleIndex());
       refreshReviewTextArea(review);
     }
   }

   private void loadCategories() {
     bookShelfService.getCategories(new AsyncCallback() {
       public void onFailure(Throwable caught) {
         reviewTextArea.setText(caught.toString());
       }
       public void onSuccess(Object result) {
         setCategories((List) result);
         refreshCategoryListBox(getCategories());
       }
     });
   }

   private void refreshCategoryListBox(List categories) {
     categoryListBox.clear();
     if (categories != null) {
       for (Iterator it = categories.iterator(); it.hasNext();) {
         String category = (String) it.next();
         categoryListBox.addItem(category);
       }
     } else {
       categoryListBox.addItem(WAIT_MESSAGE);
     }
   }

   private void loadTitlesInCategory(String categoryName) {
     bookShelfService.getTitles(categoryName, new AsyncCallback() {
      public void onFailure(Throwable caught) {
        reviewTextArea.setText(caught.toString());
      }
      public void onSuccess(Object result) {
        setTitlesInCategory((List) result);
        refreshTitleListBox(getTitlesInCategory());
      }
     });
   }

   private void refreshTitleListBox(List titlesByCategory) {
     titleListBox.clear();
     if (titlesByCategory != null) {
       for (Iterator it = titlesByCategory.iterator(); it.hasNext();) {
         String title = (String) it.next();
         titleListBox.addItem(title);
       }
     } else {
       titleListBox.addItem(WAIT_MESSAGE);
     }
   }

   private void loadReviews(int selectedCategoryIndex, int selectedTitleIndex) {
     String categoryName = categoryListBox.getItemText(selectedCategoryIndex);
     String titleName = titleListBox.getItemText(selectedTitleIndex);
     bookShelfService.getReviewText(categoryName, titleName, new AsyncCallback() {
       public void onFailure(Throwable caught) {
         setReview(caught.toString());
       }
       public void onSuccess(Object result) {
         setReview((String) result);
         refreshReviewTextArea(getReview());
       }
     });
   }

   private void refreshReviewTextArea(String review) {
     if (review != null) {
       reviewTextArea.setText(review);
     } else {
       reviewTextArea.setText(WAIT_MESSAGE);
     }
   }
}

Communicating with the Server

In order to communicate with the server, we need two interfaces on the client side, and an implementing class on the server side. The implementing class is a Servlet, and subclasses the RemoteServiceServlet class provided with the GWT toolkit. The first interface on the client side is an interface specifying what services are exposed by the Servlet, and the second one is an Async version of the service interface that is used by the GWT callback mechanism. Notice that the Async version always returns void and has an extra AsyncCallback parameter for each corresponding method. The AsynCallback is where the results are passed back to the client.

1
2
3
4
5
6
7
package org.sujit.bookshelf.client;

public interface BookShelfService extends RemoteService {
  public List getCategories();
  public List getTitles(String category);
  public String getReviewText(String category, String title);
}
1
2
3
4
5
6
7
8
9
package org.sujit.bookshelf.client;

import com.google.gwt.user.client.rpc.AsyncCallback;

public interface BookShelfServiceAsync {
  public void getCategories(AsyncCallback callback);
  public void getTitles(String category, AsyncCallback callback);
  public void getReviewText(String category, String title, AsyncCallback callback);
}

On the server side, there is a simple Servlet which implements the BookShelfService interface and extends the GWT RemoteServiceServlet. Although there are no guidelines on where to place it, I decided to put it in a server directory, a sibling of the client directory, and that seems to work fine.

 1
 2
 3
 4
 5
 6
 7
 8
 9
10
11
12
13
14
15
16
17
18
19
20
21
22
23
24
25
26
27
package org.sujit.bookshelf.server;

import javax.servlet.ServletException;

import org.sujit.bookshelf.client.BookShelfService;

import com.google.gwt.user.server.rpc.RemoteServiceServlet;

public class BookShelfServiceServlet extends RemoteServiceServlet implements BookShelfService {

  public void init() throws ServletException {
    super.init();
    // database setup
  }

  public List getCategories() {
    // database call
  }

  public String getReviewText(String category, String title) {
    // database call
  }

  public List getTitles(String category) {
    // database call
  }
}

Handling Asynchronicity

If you look at any of the loadXXX() methods in the BookShelfViewer.java widget code, you will notice that calls to the BookShelfService servlet instantiate an anonymous AsyncCallback inner class. The result object in onSuccess() contains the object returned by the corresponding call to the server, so you will need to cast it appropriately.

 1
 2
 3
 4
 5
 6
 7
 8
 9
10
11
12
13
   private void loadReviews(int selectedCategoryIndex, int selectedTitleIndex) {
     String categoryName = categoryListBox.getItemText(selectedCategoryIndex);
     String titleName = titleListBox.getItemText(selectedTitleIndex);
     bookShelfService.getReviewText(categoryName, titleName, new AsyncCallback() {
       public void onFailure(Throwable caught) {
         setReview(caught.toString());
       }
       public void onSuccess(Object result) {
         setReview((String) result);
         refreshReviewTextArea(getReview());
       }
     });
   }

Another thing that took me some time to get used to was the fact that because AsyncCallback is asynchronous, the widget can call for data after it is requested from the server but before it is returned. As a result you are likely to get a NullPointerException on the client. The trick is to check for whether the result is null, and if so, to replace it with a generic "Waiting for server..." message, like the refreshXXX() methods here. As a user, you will probably never notice the message, but your application will not get the NullPointer.

1
2
3
4
5
6
7
   private void refreshReviewTextArea(String review) {
     if (review != null) {
       reviewTextArea.setText(review);
     } else {
       reviewTextArea.setText(WAIT_MESSAGE);
     }
   }

Running the shell

To run the application in the GWT shell, we need to start the ${projectName}-shell script that was generated when we ran the applicationCreator script. This gives us two windows, one to show the log messages, as shown below. The shell starts an embedded Tomcat server on port 8888.

Testing

Its great that GWT provides a script to create a JUnit test case, but in my opinion this is of limited use, since it does not support events. To fire events, you presumably have to call these methods in your test, and verify that the ListBoxes get populated as you intend. It may be more useful to test the server side thorougly, and verify manually that some of the cases are adequately handled on the front end. But that may just be true for this component, not for more complicated ones.

Deployment

The Javascript files are deployed into www/${componentClassName} directory. For those of you who did not particularly fancy my plain old HTML component, GWT offers you the ability to style the component from within Java by linking in a CSS Style sheet. Tweaking the Javascript is really not an option, and is counter-productive, since now you have to apply the same tweaks each time you change your Java code. And you have only to look at each cache file to realize how difficult it is going to be to tweak the Javascript. From what I have found, GWT supports Netscape, Firefox, MSIE, Opera and Safari, by generating different versions of the Javascript code and using browser signature sniffing to direct to the right Javascript.

Conclusion

The best part about GWT is that the developer does not have to know or write Javascript. Many expert Java developers trivialize Javascript, as if it were beneath them to have to write Javascript, but speaking for myself, I just don't know Javascript as well as I know Java. Also, Javascript is a more forgiving language, so it allows you to get away with incorrect syntax, but will manifest itself as runtime errors which are very hard to debug. Tool support for Javascript is also not as good as for Java. Personally, therefore, I found it easier to work with the GWT's Swing style code, even though I haven't done much desktop Java programming. One of the deal breakers with GWT is the quality of the generated Javascript, which comes back in one big block without indentation and such, so its very hard to tweak. However, since GWT works by generating Javascript, tweaking the Javascript will actually lead to a maintenance nightmare in any case, so the correct approach would be to fix the Java code to do what you want.

Overall, I found GWT to be quite flexible and easy to work with. The scripts to create an project make it very easy to get up and running with GWT. The GWT shell is also a real time saver since all you have to do to push your Java code changes out to Javascript is to click the Refresh button. Working with a server component does not work quite so well in the shell, especially if you have to use JDBC libraries and such. I got around this by mocking out my server component to not use JDBC, but looking back, I could have either put my server component outside on another application server (a good move in any case, since that way I could test it independently), or by adding the JDBC JAR files in the BookShelfViewer.lanch file.

GWT seems to be most suitable for AJAX applications that are standalone, in the sense that they do not interact with other components (AJAX or non-AJAX) on the web page. For example, GWT may not be the best choice if my Go button needed to send a form action request back to the server with a consequent page turn. However, if the component controls its own life cycle, such as something like Google maps, which are pretty much full page AJAX rich clients, then GWT would definitely be the way to go.